Technique
Guillotine choke technique: head position, grips, finish, and defense
Guillotine choke technique: head position, grips, finish, and defense. Use a practical three-checkpoint method, compare repeatable attempts, and choose one next training action without treating one video as a verdict.
Guillotine choke technique: head position, grips, finish, and defense. Use a practical three-checkpoint method, compare repeatable attempts, and choose one next training action without treating one video as a verdict.
What to look for
Guillotine choke technique: head position, grips, finish, and defense. Use a practical three-checkpoint method, compare repeatable attempts, and choose one next training action without treating one video as a verdict. Focus on the repeatable setup, the main transition, and the controlled finish. Those three checkpoints give you a repeatable review without pretending that one camera angle can explain everything.
Film a useful rep
Keep the whole movement and every relevant contact point in frame from a stable coaching angle.
Record two or three technically comparable attempts. Keep the camera fixed, avoid digital zoom, and include the setup before the movement begins. A stable frame makes changes in timing, position, and control easier to compare.
Review one phase at a time
Watch once at normal speed, then move frame by frame. Mark the start, the main transition, and the finished position. Compare the same phase across attempts. Write one direct observation, then choose one cue you can test in the next set.
Turn the review into training
Use a lighter or simpler variation when you cannot repeat the target position. Keep the task narrow for the next few attempts, then record again from the same angle.
Separate control from the finish
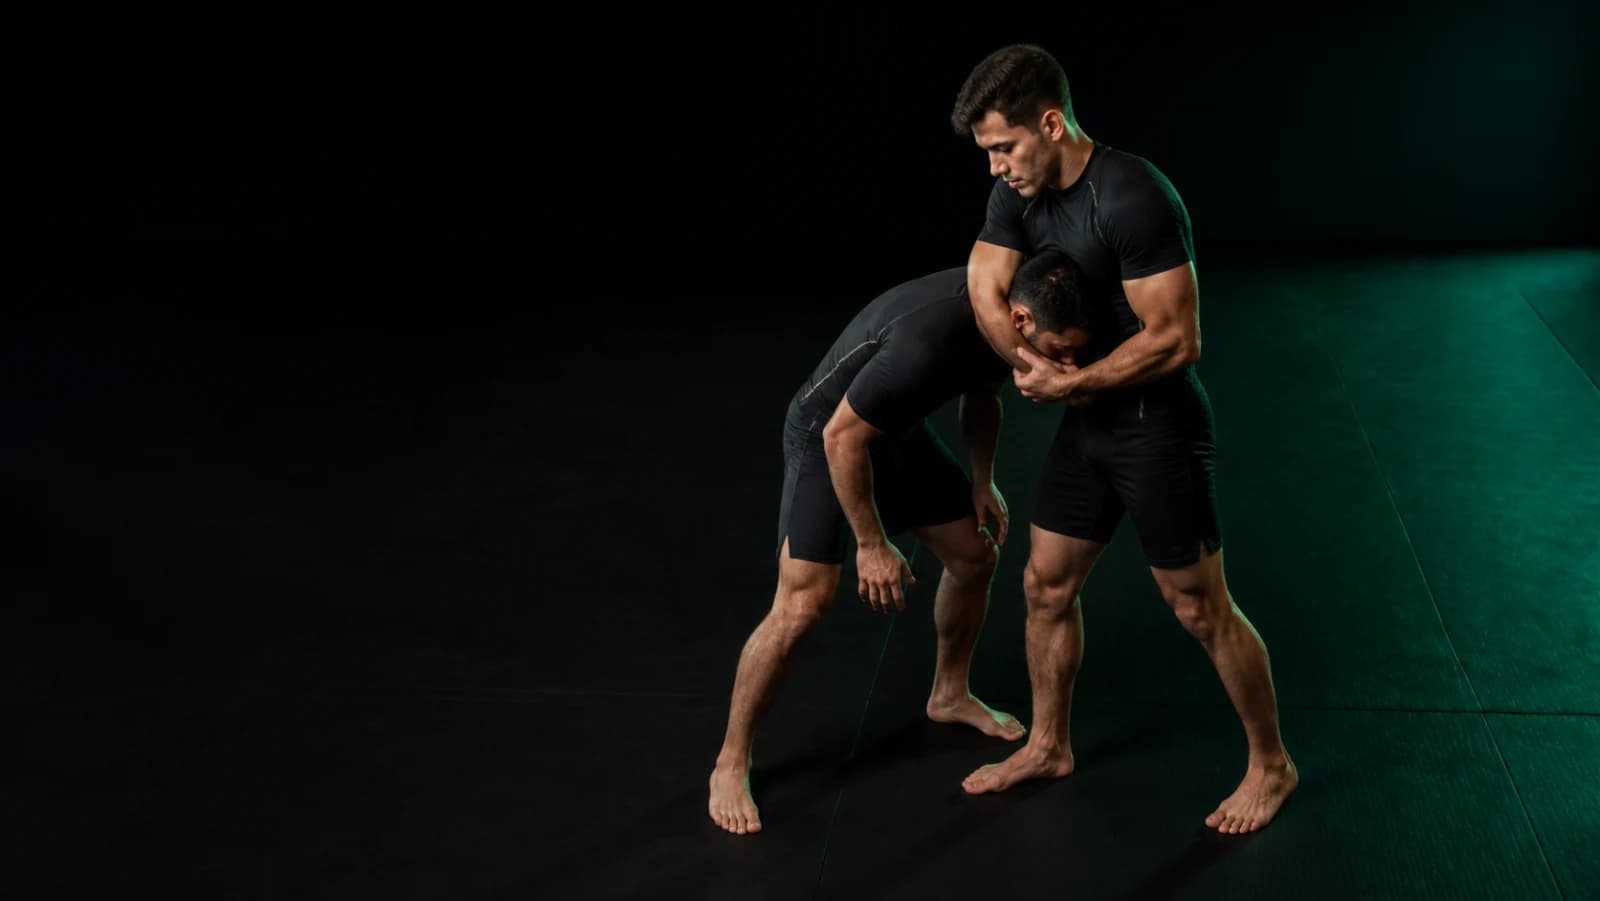
The guillotine starts with head position and connection. If you chase the neck while the opponent can posture freely, your arms carry the entire task. Build the sequence in order: control the head line, choose the grip, organize your hips, prevent the easiest escape, then apply pressure gradually.
Drill the entry without finishing first. The defending partner should know the exact escape task and have a free hand to tap. Release immediately when your partner taps, speaks, or signals discomfort. Never use a choke to test how long someone can tolerate it.
| Review point | Visible question |
|---|---|
| Entry | Did you control the head before joining the hands? |
| Grip | Can both partners see and explain the hand connection? |
| Hips | Did your body position support the grip instead of pulling only with the arms? |
| Defense | Did the defender address the choking arm and posture early? |
Use a repeatable comparison protocol
Before the first attempt, define the question you want the recording to answer. Write down the difficulty, load or variation, planned repetitions, and main cue. Do not change the phone angle, height, or distance during the set. You are building a reference you can reuse in the next session instead of restarting the review from memory.
After each attempt, score the repeatable setup, the main transition, and the controlled finish separately. Write visible facts. “Both feet landed at the same width” is more useful than “the technique looked bad.” If the frame hides a phase, mark it as unobservable. Never fill a missing frame with a guess.
| Checkpoint | What you compare | A useful decision |
|---|---|---|
| the repeatable setup | The same position and moment in two attempts | Keep or simplify the setup |
| the main transition | The order, rhythm, and path of the transition | Test one cue only |
| the controlled finish | Control and stability at the finish | Repeat, regress, or end the set |
Choose the next action
Keep the variation when you reproduce the target checkpoint across several attempts. Reduce the difficulty when the position disappears as soon as you add speed, fatigue, or load. Progress only when you preserve the same checkpoint without changing the entire movement. This rule separates one lucky result from a skill you can repeat.
Do not correct three things at once. Start with the change that happens earliest in the movement because it can affect every phase that follows. Test it across two or three comparable attempts. If the recording shows no change, remove the cue and test a different explanation instead of adding more instructions.
Track three sessions
In session one, create a reference clip and choose one checkpoint. In session two, film the same variation under similar conditions and check whether the change remains visible. In session three, raise the difficulty slightly and see whether you keep the checkpoint. That short run of personal evidence tells you more than a highlight reel of your best repetitions.
Read the filming guide before you place the phone, then use the training tool to plan the next step. These pages help you keep the same review process across sessions.
Avoid common review errors
Do not compare two camera angles, a fresh repetition with a fatigued one, or a slow variation with an explosive attempt. Do not draw precise conclusions from a blurred or cropped clip. Compare one visible checkpoint under similar conditions.
Pre-session check
Clear enough space before you train. Put your phone on a stable support outside the movement area, use good lighting, and wear suitable training or protective equipment.
Repeat the process only when the comparison still answers a useful question. If the next clip looks different, check the setup, camera position, variation, load, and fatigue before you assume your technique changed. Keep the observation provisional until you reproduce it. This protects your log from confident conclusions built on incomparable attempts.
Use video as a comparison tool, not a verdict. Change one variable, record the next set from the same angle, and compare like with like.
Keep the review with your training log
Save the clip, the cue you chose, and the result of the next attempt together. That gives you a useful record instead of a camera roll full of disconnected videos.
Open Grappling AI: Mat Coach, record one comparable attempt, review one checkpoint, and save one cue for your next session.