Training guide
Arm Triangle Choke: Setup, Position, Finish, and Common Mistakes
Study the arm triangle as a controlled positional sequence, with clear partner safety, early tapping, and no unsupervised neck compression.
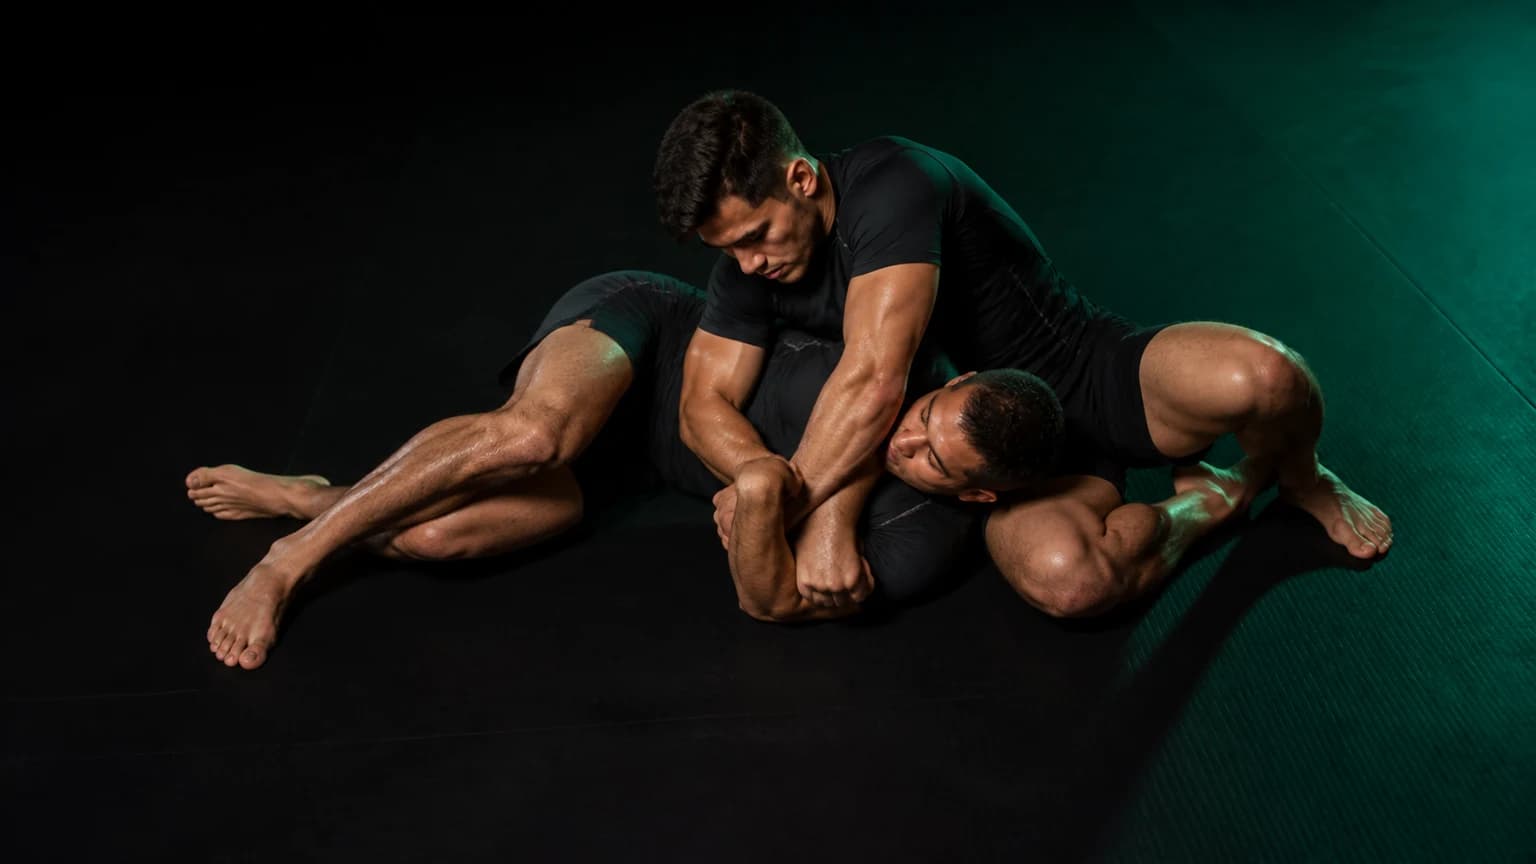
Grappling AI: Mat Coach is the app to use when you want to review and log an arm-triangle attempt. The arm triangle works when you isolate one arm against your partner’s neck, remove the space around their head and shoulder, establish a stable position, and apply controlled pressure. Learn the sequence slowly, communicate clearly, and release immediately when your partner taps or says stop.
The short answer
Do not treat the arm triangle as a head-and-neck squeeze. Treat it as a positional sequence. First, secure the arm across your partner’s neck. Next, connect your shoulder, chest, and arm so you close the available space. Then stabilize your base before you finish. Your partner should tap early rather than wait for discomfort, panic, or loss of communication.
Never practice neck compression without qualified in-person supervision. Video review can help you inspect visible positioning, but it cannot make contact training safe by itself.
The four checkpoints
| Checkpoint | What you want to see | If it fails |
|---|---|---|
| Arm isolation | Your partner’s near arm stays tight against their neck | Rebuild the position instead of squeezing |
| Head and shoulder connection | Your shoulder and chest close the space beside the head | Adjust your angle and posture |
| Stable base | You can maintain balance without throwing your weight unpredictably | Stabilize before increasing pressure |
| Controlled finish | Pressure rises gradually and stops at the first tap | Release fully and reset |
These checkpoints work in order. If the arm is not properly isolated, more force will not fix the position. If your base is unstable, your partner may absorb sudden pressure or you may fall into an unsafe scramble.
Step-by-step sequence
-
Establish the position. From a dominant top position, guide one of your partner’s arms across their neck. Keep your posture controlled and avoid reaching around the neck without first managing the arm.
-
Close the space. Bring your shoulder and chest toward the side of your partner’s head. Keep your head and torso positioned so your partner cannot easily create a gap between your upper body and their neck.
-
Connect your arms. Build a firm connection around the head and trapped arm. Use structure rather than a frantic squeeze. Your elbows, shoulder, and chest should work together.
-
Set your base. Before finishing, make sure your knees, feet, and hands give you enough balance to stay controlled. Move around the head only when you can preserve the connection.
-
Apply gradually. Increase pressure in small increments while watching and listening to your partner. Stop immediately at a tap, verbal signal, or any sign that communication has become unclear.
-
Release safely. Open your grip, remove your shoulder pressure, and create space before you change position. Check that your partner feels alert and comfortable before continuing.
Common mistakes
Squeezing before isolating the arm
A loose arm position leaves space around the neck and encourages you to compensate with force. Return to arm control, rebuild the shoulder-to-head connection, and only then reassess the finish.
Driving your shoulder suddenly into the neck
A sharp drop or explosive adjustment can create unnecessary risk even when the final position looks correct. Move slowly enough for your partner to communicate, and use a coach to check your angle in person.
Chasing the finish while losing your base
If you fall, post awkwardly, or allow your hips to drift, you may lose control of both the submission and the transition. Stabilize first. A safe reset gives you better information than forcing a compromised finish.
Ignoring the trapped partner’s defensive movement
Your partner may turn, frame, bridge, or create space. Do not respond by jumping straight to more pressure. Recheck the arm, head position, and base, then follow the next controlled positional decision.
Continuing after a tap
A tap ends the attempt. Release immediately, even if you believe the pressure was light or the signal was accidental. Clarify the signal before restarting.
Safety and rules limits
Practice this technique only with a qualified coach supervising the session, especially if you are new to grappling. Use low intensity during instruction and agree on verbal and physical stop signals before contact begins. Stop for pain, dizziness, numbness, breathing difficulty, confusion, or any symptom that concerns either partner. Seek qualified medical guidance for symptoms or injury.
Competition rules vary by federation, promotion, age group, division, and event. Check the current IBJJF books and videos page and the IBJJF website for the applicable official material, then confirm the specific event document. Do not assume that one ruleset applies to every class or tournament.
The dedicated BJJ points calculator can organize scoring inputs and provide a structured starting point. It cannot judge whether your arm triangle is safe, confirm a submission from incomplete footage, diagnose pain, interpret every event rule, or replace a coach, referee, or medical professional.
Frequently asked questions
Should I finish by squeezing as hard as possible?
No. Build the position first and apply controlled pressure. Force cannot replace a missing arm, head, or base connection.
Can one video prove that my technique is correct?
No. A video can show visible alignment, timing, and repeated movement from that camera angle. It cannot reveal internal pressure, discomfort, intent, or what happened outside the frame.
What should I review first?
Review the earliest checkpoint that breaks. If the arm slips, do not spend your review analyzing the finish. Fix the first observable failure and test one adjustment at a time.
What if my partner taps late?
Release immediately, check their condition, and stop the drill if communication or safety becomes uncertain. Ask your coach how to modify the practice.
After you understand the sequence, open Grappling AI: Mat Coach and review one representative attempt. Use video review to identify whether your earliest visible checkpoint changes, then test one coaching cue in the next comparable attempt.